
iPhone Camera Tips
iPhone cameras, and really all smartphones in general, have made mind-blowing progress in the last decade. So much so that Sony, one of the biggest DSLR camera manufacturers, has come out to say that in the next 3 years Smartphone cameras will outperform DSLR cameras. Now you can grasp how powerful that small circle at the back of your iPhone is. In this article, we’ll show you how to increase your iPhone camera experience and take better advantage of your iPhone’s powerful camera.
Play Music While Taking Videos
Have you ever tried recording a video while listening to your favorite song? If you have, then you know how annoying it is when as soon as you hit the record button, the song stops.
To stop this from happening, all you have to do is open your camera app as usual, but instead of swiping to video mode, stay in photo mode, then hold down the capture button. In less than a second, your phone will begin to record a video. And yes, your song will keep on playing.
Never Miss the Perfect Shot
Burst mode is an iPhone camera feature that allows you to take a lot of photos in very quick succession, capturing ten pictures per second. This is really useful for capturing the perfect moment, especially if you’re trying to shoot a moving subject. Once you’re done shooting, just go into your photo apps and pick the best picture. You won’t have to worry about missing your shot because you didn’t hit the capture button at the right time anymore.

Live mode
I’m sure you already know that using Live mode on your iPhone camera captures everything that happens for a few seconds before and after you take a photo, including the audio. But did you know that you can go into your photo editor and pick any recorded frame as your key photo? This feature is really useful if you don’t trust the photography skills of the person behind the camera. So if you don’t like the result, you’ll always have other options.
To do this, open your gallery, then go to the live photo that you want to change its keyframe for. Press the edit button in the top-right corner. Next, tap on the Live Photo icon at the bottom of the screen. Now you’ll see a slider with all available frames in the live photo. Once you’ve found a frame you like, tap on “Make Key Photo.” Then you’re done, and you can always revert your changes later on.
Long Exposure
Long Exposure shots are those cool shots you see where moving objects are blurry, and still objects look normal. You know, like those shots where cars are blurry in the background while people on the street look sharp
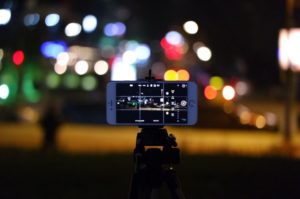
To do this with your iPhone, you’ll need a tripod or at least some way to keep your iPhone very still, as holding it won’t cut it. You’ll also need a moving subject. When you’re ready, take a long exposure shot by following these steps.
- Open your camera app, then turn on live photos.
- Set the self-timer to 3–10 seconds.
- Place your phone on a tripod or any other way you can think of to keep it steady, then frame your shot.
- Take a live photograph.
- Open up the photos and click the photo.
- Swipe up to reveal the effects menu.
- Swipe left until you see the long exposure effect, then tap it.
- And your long-exposure photo is done.
If you don’t like the end result, you can always undo the effect in your editor.
Try a New Angle
This next tip will help you take pictures with awesome foreground details and give your picture a new perspective. To do this, place your phone very close to the ground, then flip it upside down and tilt it up. This is going to give your photo dimension, add foreground, and direct lines toward your subject.
To read more about some new updates and specification to iPhone’s latest iPhone 14 Pro, check out our blog!


