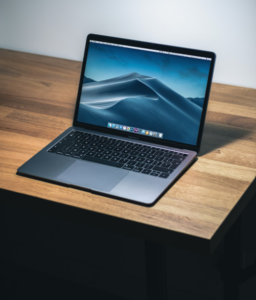
MacBooks are considered by many to be the best laptops available, and that statement has been backed up time and time again by Apple’s incredible macOS software, premium body, wonderful keyboard, and phenomenal M chips. In this article, we’re going to show you some cool tips and tricks for MacBook to help you get the most out of your experience.
Open Apps at Login
Are there apps you always open up immediately when you login to your MacBook? Then this Apple MacBook tip will save you a good few seconds of navigation, clicking, and app loading time.
- On your Mac, choose Apple menu > System Settings, click General in the sidebar, then click Login Items on the right. (You may need to scroll down.)
- Next, add a login item: click the Add button below the list of items, select a document, folder, app, server, or other item, and then click Add.
OR
- Right-click on the app.
- Right-click on the app icon in the Dock or in Finder.
- Select Options from the menu.
- Check the box next to Open at Login.
If you haven’t figured it out already, what this setting does is make the apps you select automatically open when you turn on your MacBook.
Sign PDF
Tired of going through the hassle of printing out documents, signing them, scanning them, and sending them back all because you want to sign a PDF? With this simple tricks for MacBook, you don’t have to go through all that anymore.
Instead, anytime you get a document you need to sign, here’s what you do. Start by attaching the PDF document you wish to sign to a new email in the Mail app. Once attached, hover your cursor over the PDF file to reveal a small arrow button in the top-right corner. Click on this arrow to reveal the ‘Mark Up’ option. Once selected, the PDF will open, and you’ll find the signature tool at the top, represented by an icon resembling a squiggly signature with a cross to the left.
You can choose to use a signature you’ve used before, or you can create a new signature. You can add your new signature by drawing it on your MacBook trackpad or your iPhone, or you can draw your signature on a piece of paper and then hold it up to the webcam on your Mac.
Hot Corners
One of my personal favorite tricks for MacBook is a feature called Hot Corners. Basically, what this feature does is make your MacBook do selected actions whenever you move the cursor into any corner of the screen. You can do things like make your MacBook go to sleep when your cursor enters the left top corner or even shut down your MacBook when it enters the top right corner.
To use hot corners, you need to enable them in System Preferences. Here’s how:
- Click the Apple menu > System Preferences.
- Click Desktop & Screen Saver.
- Click Hot Corners.
- For each corner, click the pop-up menu and select an action.
- Click Done.
Change Folder Icons
A nice customization feature on the MacBook that not many people know about is that you can easily change the icon of any folder on your desktop. And you can change it to just about anything- all you need to do is have a picture.
To do this, get the picture you want to change the folder icon into and place it on your desktop, then right-click on the folder whose icon you want to change. On the menu that pops up, click In this quick settings tab, drag and drop the picture there.
Link Preview
Did you know you could preview any link on the web using just a simple keyboard gesture with Safari on your Apple Macbook? All you have to do is tap and force touch on a link.
Control your MacBook with your head
Yes! You can control your entire Apple MacBook with just your head. Not only is this one of the most fun tricks for MacBook, it is also an accessibility feature mostly aimed at paralyzed people.
To enable this feature, open Settings>Accessibility>Pointer Control>Toggle on Head Pointer. Once you toggle it on, your cursor will start being controlled by your head.
If you really like this feature, you can set up a quick activation shortcut by hitting the info button next to the toggle. Then switch on the “Use a switch or facial expression to pause or resume” toggle. Now you can activate Head Navigation by pushing the F10 button.
To take this even a step further, go back into accessibility settings. Toggle on Alternative Pointer Action and hit the info button. In the pop-up menu, click the plus button and select Facial Expressions. Now you can assign actions like right click, left click, etc. to various facial expressions.
Add a Website To The Apple Bar.
If you have websites you frequently visit, with this quick tip, you’ll learn how to add the website directly to the dock like an app.
First, open your Safari browser, load up the website, then tap on the file and select the Add to Dock option. And in a moment, your newly created web app will be added to your dock. Now you can visit your favorite websites much faster and more conveniently.


